Home renovations can feel daunting, especially when you’re staring at the high costs of hiring tradespeople. But with a little time, effort, and the right tools, you can tackle many projects yourself, saving thousands while giving your home a fresh, personalized look.
Discover our guide to Easy DIY Home Renovation Projects that can rejuvenate your living space without a hefty price tag.
Below, we’ve rounded up seven beginner-friendly DIY home renovation projects that require minimal tools and skills. Plus, we’ve included placeholders for Amazon affiliate links to help you grab the supplies you need. Let’s dive in and transform your space without breaking the bank!
Disclaimer: This blog post may contain affiliate links. This means I earn a small commission on qualifying purchases at no extra cost to you, my appreciated reader.
Why Go DIY for Home Renovations?
DIY projects are more than just cost-saving—they’re empowering. You get to learn new skills, customize your home to your taste, and avoid the hefty price tags of professional services (which can range from $500 to $2,000 per project). These projects are designed for beginners, requiring only basic tools and a weekend or two. Ready to get started? Here’s how to revamp your home on a budget.
1. Painting Walls for a Fresh Look
Nothing transforms a room faster than a fresh coat of paint. Whether you’re brightening up a living room or adding a bold accent wall to your bedroom, painting is a beginner-friendly project that delivers instant results.
Why It’s Easy
Painting requires minimal tools, and with proper prep, you can achieve professional-quality results. It’s forgiving, too—if you make a mistake, just paint over it!
What You’ll Need

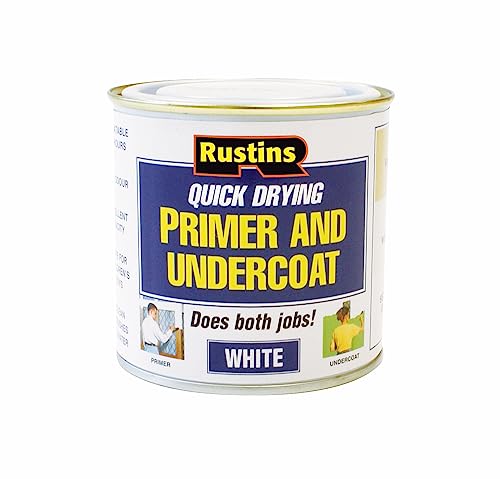
- Primer
- Painter’s tape
- Drop cloths (canvas is best)

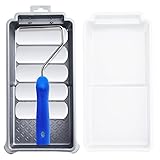
- Paint rollers and paint brushes
- Paint tray

Steps
- Clean walls with a damp cloth to remove dust or grease.
- Apply painter’s tape to trim, windows, and edges for clean lines.
- Use a primer if switching to a drastically different color or covering stains.
- Apply 2-3 thin coats of paint, letting each dry completely (check paint can for drying times).
- Remove tape carefully and clean up any drips.
Cost & Savings
- Cost: $50-$150 for supplies.
- Savings: Skip professional painters, who charge $500-$2,000 per room.
- Pro Tip: Watch YouTube tutorials on “cutting in” to master clean edges without tape.
2. Installing a Peel-and-Stick Backsplash
Want to upgrade your kitchen or bathroom without the mess of traditional tiling? Peel-and-stick backsplash tiles are adhesive, easy to cut, and require no grout, making them perfect for DIYers.
Why It’s Easy
These tiles stick directly to clean surfaces, and you can cut them with a utility knife—no power tools needed. They’re also removable, ideal for renters.
What You’ll Need
- Peel-and-stick tiles
- Utility knife

- Measuring tape
- Level (small bubble level is fine)

- Straightedge or ruler
Steps
- Clean and dry the wall thoroughly to ensure adhesion.
- Measure your space and cut tiles to fit using a utility knife.
- Peel off the backing and apply tiles in your desired pattern (e.g., subway or herringbone).
- Press firmly and use a level to keep lines straight.
Cost & Savings
- Cost: $100-$300 for a kitchen or bathroom backsplash.
- Savings: Avoid $500-$1,500 for professional tile installation.
- Pro Tip: Start in a less visible corner to practice alignment before tackling prominent areas.
3. Updating Cabinet Hardware
Swapping out old cabinet knobs and pulls is a quick, affordable way to modernize your kitchen or bathroom. It’s a small change with a big impact.
Why It’s Easy
This project requires just a screwdriver and a few minutes per cabinet. It’s perfect for beginners who want a low-effort upgrade.
What You’ll Need
- New cabinet knobs or pulls like modern or vintage-style cabinet hardware

- Multi-bit screw driver
- Optional: Template for consistent placement
Steps
- Remove old hardware using a screwdriver.
- Clean cabinet surfaces to remove grime.
- Install new knobs or pulls, ensuring screws are tight and aligned.
Cost & Savings
- Cost: $20-$100, depending on hardware quality and quantity.
- Savings: Avoid $200-$500 for minor cabinet refinishing by professionals.
- Pro Tip: Check that new hardware screw lengths match your cabinets to avoid extra purchases.
4. Installing Floating Shelves
Floating shelves add storage and style to any room, from displaying decor in a living room to organizing spices in a kitchen. They’re simple to install and look sleek.
Why It’s Easy
Most floating shelf kits come with brackets and instructions, and you only need basic tools to mount them securely.
What You’ll Need

- Stud finder

- Level
- Cordless Drill

Steps
- Use a stud finder to locate studs or mark spots for wall anchors.
- Drill holes and install brackets or anchors per the shelf kit instructions.
- Mount the shelf and check with a level to ensure it’s even.
Cost & Savings
- Cost: $20-$100 per shelf.
- Savings: Avoid $150-$400 for professional shelving installation.
- Pro Tip: Check the shelf’s weight limit to ensure it can hold your items safely.
5. Refinishing or Painting Furniture
Give old furniture a new life by sanding and repainting or staining it. This project is perfect for dressers, tables, or chairs that need a refresh.
Why It’s Easy
Sanding and painting are straightforward, and chalk paint options let you skip sanding for some pieces. It’s a creative way to customize your furniture.
What You’ll Need
- Sandpaper
- Primer
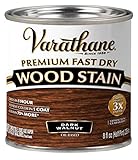
- Paint or stain
- Brushes or foam rollers
Steps
- Sand surfaces to remove old finish or rough up glossy areas.
- Clean off dust with a damp cloth.
- Apply primer, followed by 2-3 thin coats of paint or stain.
- Seal with polyurethane for a durable finish.
Cost & Savings
- Cost: $30-$100 for supplies.
- Savings: Avoid $200-$800 for professional furniture refinishing.
- Pro Tip: Try chalk paint for a no-sand option if your furniture is in good condition.
6. Installing a New Faucet
Upgrading a kitchen or bathroom faucet can elevate the space and improve functionality. Modern faucets are designed for easy installation, even for beginners.
Why It’s Easy
Most faucets come with clear instructions and fit standard plumbing setups, requiring only basic tools.
What You’ll Need
- New faucet

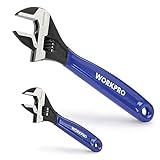
- Adjustable wrench
- Plumber’s tape
- Bucket
Steps
- Turn off the water supply under the sink.
- Remove the old faucet by unscrewing connections (place a bucket to catch drips).
- Apply plumber’s tape to the threads of the new faucet.
- Install the new faucet, tighten connections, and turn the water back on.
- Check for leaks and tighten if needed.
Cost & Savings
- Cost: $50-$200 for a faucet.
- Savings: Avoid $150-$500 for a plumber’s visit.
- Pro Tip: Take a photo of the old setup before disassembling for easy reference.
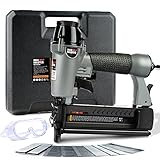
7. Adding Crown Molding or Trim
Crown molding or baseboard trim adds elegance to any room. Lightweight or pre-cut options make this project manageable for beginners.
Why It’s Easy
Foam or MDF molding is easy to cut and install, and adhesive options eliminate the need for power tools in some cases.
What You’ll Need
- Crown molding or trim
- Miter saw or miter box
- Measuring tape
- Nail gun or adhesive
- Caulk and paint
Steps
- Measure walls and cut molding at 45-degree angles for corners using a miter saw or box.
- Attach molding with a nail gun or adhesive.
- Caulk gaps for a seamless look and paint to finish.
Cost & Savings
- Cost: $50-$200 for materials.
- Savings: Avoid $500-$1,500 for professional trim installation.
- Pro Tip: Opt for foam molding if you’re new to cutting angles—it’s forgiving and lightweight.
Tips for DIY Success
- Start Small: Tackle one project at a time to build confidence. A single room or small area is a great starting point.
- Watch Tutorials: Channels like Home Depot, This Old House, or DIY Creators on YouTube offer step-by-step guides for free.
- Prioritize Safety: Wear gloves, goggles, and masks when sanding, cutting, or working with chemicals.
- Rent Tools: Save money by renting tools like nail guns or miter saws from Home Depot or Lowe’s.
- Check Local Codes: For plumbing projects like faucets, ensure you follow local regulations to avoid issues.
Final Thoughts
These seven DIY home renovation projects are perfect for beginners looking to save money and personalize their space. From painting walls to installing a sleek new faucet, each project offers big impact for minimal cost. Grab your supplies (check out the Amazon links above for quality products), set aside a weekend, and start transforming your home today. Have a favorite project or need more tips? Let us know in the comments! PS: Don’t forget to check out our guide on how to install contact paper and save money.
Happy DIY-ing!